
Introduction
Imagine stepping onto your lush, green artificial lawn, and feeling the soft cushion beneath your feet—it’s a slice of paradise right in your backyard. But here’s the secret to making that experience even better: artificial grass shock pads. These unsung heroes of landscaping not only enhance comfort but also improve the durability and drainage of your synthetic grass system. Think of them as the foundation that ensures your lawn lasts longer performs better, and remains pleasant.
In this guide, we’re focusing on XPE foam shock pads—one of the most popular options for DIY enthusiasts looking to boost their artificial turf setups. With their excellent cushioning properties, superb drainage capabilities, and ease of installation, XPE foam pads are the perfect choice for any homeowner who wants to elevate their outdoor space. In the following sections, we’ll walk you through preparing your ground, choosing the right shock pads, installing them yourself, and maintaining them for years to come. Whether you’re a seasoned DIYer or a beginner, we’ve got you covered.
Pre-Installation: Preparing Your Ground for Artificial Grass Shock Pads
Before installing your XPE foam shock pads, it’s essential to prepare your ground properly. Think of this step as laying the groundwork for a long-lasting and functional outdoor paradise. After all, even the best shock pads won’t perform well unless the surface they’re laid on is smooth and properly prepared.
Clearing the Area
First things first—let’s clear the area of any debris, rocks, or weeds that might be in the way. If you’re replacing natural grass, remove the old sod entirely. This can be done with a shovel or a turf cutter, depending on how large your space is. If you’re working with a garden bed or lawn that has existing vegetation, make sure to clear everything down to the soil so that the shock pads can sit flat on a solid surface.
Leveling the Ground
Once you’ve cleared the area, it’s time to level the ground. Uneven terrain can cause the shock pads to shift over time, leading to bumps and discomfort when walking on your artificial grass. Use a rake to level the surface, filling in low spots with sand or soil. If the surface is significantly uneven, you might need to break out a shovel and make more extensive adjustments.
Optional Ground Preparation
To take things a step further, you might consider adding a layer of crushed stone or gravel beneath the shock pads. This will help with drainage, preventing water from pooling beneath the turf and leading to potential mold or mildew issues. Not only does it ensure that your grass stays dry, but it also adds extra support for the shock pads, making them more durable.
Ensuring Proper Drainage
One of the key advantages of XPE foam shock pads is their drainage capabilities, but that doesn’t mean you should skimp on proper ground preparation. Ensure that the base has a slight slope, preferably 1-2% (a slight downward angle), so water can flow off the surface rather than pooling in one spot. Proper drainage not only extends the life of your artificial grass but also keeps your lawn looking fresh and vibrant year-round.
How to Choose the XPE Foam Shock Pads?

Now that the groundwork is prepared, it’s time to focus on selecting the right XPE foam shock pads for your project. While all shock pads serve similar purposes, choosing the right one is crucial for achieving the desired comfort, durability, and drainage efficiency.
Density
When selecting your XPE foam shock pads, consider their density. Typically, the density ranges between 30 and 50 kg/m³. A higher density provides more support and durability, making it a good choice for areas with high foot traffic or heavy use. On the other hand, lower-density pads are softer and more cushioned, offering a plush feel underfoot, ideal for areas where comfort is the top priority, such as playgrounds or relaxation zones.
Thickness
The thickness of your XPE foam shock pads is another critical factor to consider. They usually range between 8mm and 20mm in thickness. If you’re installing the pads in an area that experiences more foot traffic or impact, such as a sports field or a playground, thicker pads provide extra protection and durability. Thinner pads, while still effective, are more suitable for general landscaping or low-traffic areas. It’s all about balancing comfort with practicality.
Drainage Holes
Drainage is paramount when it comes to shock pads, and XPE foam pads are designed with drainage holes to facilitate proper water flow. These holes help prevent water from collecting beneath the artificial grass, which could lead to mold or bacteria growth. Be sure to select shock pads with ample drainage holes, especially if you live in a region with heavy rainfall or if your yard has poor drainage to begin with.
Foam Color
While green is the most common color for XPE foam shock pads, some manufacturers offer custom colors to match your landscape design. If aesthetics are important to you, consider looking for options that blend seamlessly with your artificial grass. The green pads naturally blend well with the turf, but if you have a specific design in mind, custom colors are available to suit your needs.
Width
XPE foam shock pads typically come in widths ranging from 1m to 1.5m. Choose a width that matches the area you’re covering to reduce the number of seams and joints in your installation. The wider the pads, the fewer cuts and adjustments you’ll have to make during installation, saving you time and effort.
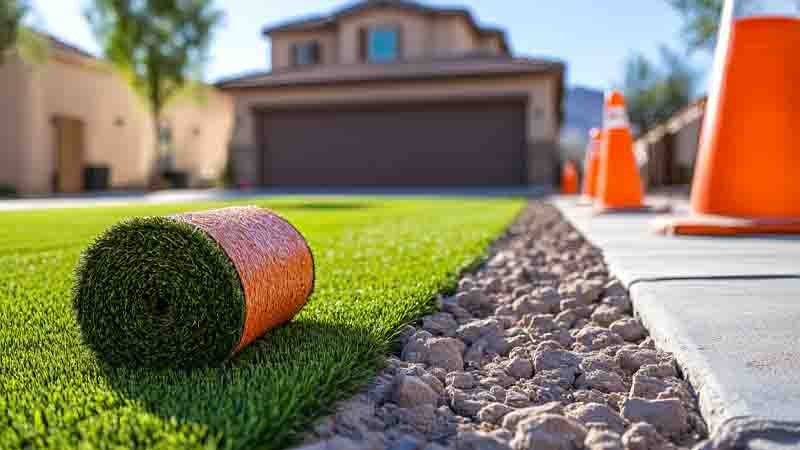
How to Install the XPE Foam Shock Pad by Yourself?
Now for the fun part—installing your XPE foam shock pads! Don’t worry, this process is entirely doable on your own with a little patience and the right tools. Follow these simple steps to achieve a smooth and professional-looking result.
Step 1: Measure the Area
Before cutting or laying down the shock pads, make sure you measure the area accurately. Take note of the length and width of the space, ensuring that you purchase the correct amount of shock pads to cover the entire surface. Measuring properly will help you avoid unnecessary cuts and ensure that the pads fit seamlessly.
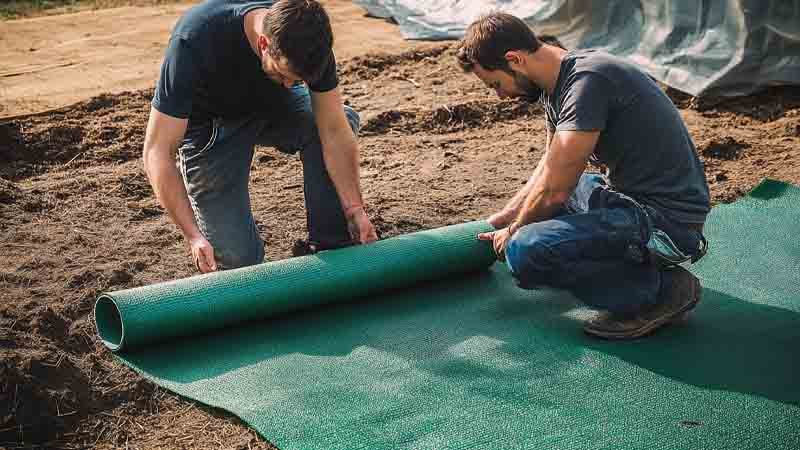
Step 2: Cut the Shock Pads
Once you have your pads, it’s time to cut them to size. Use a utility knife or scissors (depending on the thickness of your pads) to trim the shock pads to the dimensions of your area. It’s important to cut the pads carefully to avoid jagged edges, which could interfere with your installation. If you have to make cuts around obstacles like trees or posts, take your time to get the shape right.
Step 3: Lay Down the Shock Pads
With your pads cut to the right size, it’s time to lay them down. Start in one corner of your prepared ground and work your way across, ensuring that each pad fits snugly against the next. Be mindful to leave no gaps between the pads—these could create weak points in your artificial grass installation, leading to uneven surfaces. The shock pads should lie flat, covering the entire area.
Step 4: Secure the Shock Pads
While the XPE foam pads are typically non-slip, securing them in place can prevent any shifting during use. Depending on your preference and the surface you’re working with, you can either use adhesive or staples to keep the shock pads from moving. If you’re working on a particularly large area, adhesives may work best to ensure a solid, uniform base.
Step 5: Install the Artificial Grass
With the shock pads in place, it’s time to unroll your artificial grass. Carefully position the grass over the shock pads, ensuring it covers the entire area. Trim the edges as needed to ensure the grass fits perfectly. The grass should lie smoothly with no visible wrinkles or bumps.
Step 6: Final Adjustments
Now it’s time for the final touches. Secure the edges of the artificial grass by stapling them down or using adhesive. If you notice any wrinkles or bumps, smooth them out by gently pulling the turf into place. Make sure that the grass is firmly attached to the ground and that the edges are tidy.
How to Maintain the XPE Foam Shock Pad?

Maintenance is key to ensuring your artificial grass and shock pads last for years. Here’s how to keep everything in tip-top shape.
Regular Cleaning
Keep your shock pads clean by regularly removing debris like leaves, dirt, and small twigs. A simple broom or leaf blower can help keep the area clear. It’s also a good idea to periodically rinse the shock pads with water to remove dust and dirt buildup.
Brushing the Artificial Grass
To maintain the look and feel of your artificial grass, brush it regularly. This will prevent the fibers from matting down and help the grass stay upright and lush. Use a stiff-bristled broom or a turf brush to gently lift and fluff the fibers.
Avoiding Damage
Avoid placing heavy furniture or sharp objects on your artificial grass, as this could damage the XPE foam shock pads and create dents in your turf. If possible, avoid using lawnmowers or other heavy equipment on the turf as well.
Checking for Wear and Tear
Every season, inspect both the artificial grass and shock pads for signs of wear and tear. Look for areas where the grass may be thinning or the shock pads are compressing. Early detection of problems will help prevent more significant issues down the line.
Conclusion
Installing XPE foam shock pads under your artificial grass is a simple, effective way to boost comfort and durability. With the right materials and proper installation, you can create a long-lasting, resilient lawn. Not only will this DIY project save you money, but it also gives you a sense of accomplishment as you enhance your outdoor space.
The quality of the shock pads beneath your grass is crucial for comfort and performance. The right padding improves cushioning, drainage, and overall resilience, allowing your lawn to handle foot traffic, pets, and playtime. With some attention to detail and patience, the results will be well worth it.
Ready to get started? Installing your own XPE foam shock pads is easier than you think, and if you ever feel unsure, professionals are available to help bring your vision to life.
If you’re still unsure about how to choose the right XPE foam shock pad, don’t hesitate to reach out to us—we’re here to help!
FAQs
Q1: What are XPE foam shock pads made of?
XPE foam shock pads are made of cross-linked polyethylene (XPE), a durable, water-resistant material that is both lightweight and strong. This material is known for its excellent cushioning properties, making it ideal for use under artificial grass installations. The shock pads are also designed with drainage holes to help with water flow, preventing mold and ensuring long-lasting performance.
Q2: Can I use XPE foam shock pads for all types of artificial grass?
Yes, XPE foam shock pads are versatile and compatible with most types of artificial grass. Whether you’re installing grass for a residential lawn, playground, or sports field, XPE foam will provide the necessary support and cushioning. However, it’s important to select the correct thickness and density based on the specific needs of your turf and the level of foot traffic the area will experience.
Q3: How long will XPE foam shock pads last?
With proper installation and maintenance, XPE foam shock pads can last for many years—typically between 10 to 20 years. Their longevity is influenced by factors such as the climate, foot traffic, and overall care. Regular cleaning and avoiding excessive wear will help extend their lifespan, keeping your lawn comfortable and functional for longer.
Q4: Do I need to replace the shock pads regularly?
No, XPE foam shock pads do not need to be replaced regularly. As long as the pads are installed correctly and maintained, they can provide excellent support for the entire lifespan of your artificial grass. However, if you notice significant compression or damage due to heavy traffic or other factors, it might be time to replace them.
Q5: Can I install the shock pads over existing grass?
While it’s technically possible to install shock pads over existing grass, it’s not recommended. The ground needs to be leveled and cleared of any debris or vegetation to ensure that the shock pads sit flat and work effectively. Installing the pads over existing grass could lead to uneven surfaces, water drainage issues, and discomfort underfoot. It’s best to clear the area and prepare a clean, smooth base for optimal results.